Pages

Sunday, March 27, 2011

Saturday Round Up

Ok, so I'm a little late today.  My best friend arrived here from South Australia this morning so there hasn't been much computer time today.  There was plenty of Thermomixing though ;)

Here's this week's Round Up:

Sunday
  • Pancakes, raspberry instant "jam", pizza dough, pizza sauce, grated cheese
Monday
  • Breakfast smoothie, apple & pear puree baby food, chocolate custard, raspberry coulis (EDC), Mixed Dahl, coconut milk (using shredded/dessicated coconut & water...easy peasy!)
Tuesday
Wednesday
Thursday
Friday
  • Porridge, raspberry coulis, raspberry frozen yoghurt mixture, pasta with roasted capsicum sauce
Saturday
Another busy week for my dear Thermie.  Looking forward to some more adventures next week.

Happy TMXing days!

Friday, March 25, 2011

Yoghurt and Easy Raspberry Frozen Yoghurt

Having a Thermomix makes it so easy to make a variety of different foods that you would normally shell out plenty of cash for at the supermarket, all the while playing russian roulette with the contents of said items.  In particular, icecream, yoghurt and frozen yoghurt.  Yoghurt in particular is an expensive thing to buy when it is so easy to make at home for around half the shelf price using quality, organic ingredients.

Yesterday I made 2L of yoghurt, which cost me $5.30 (the cost of 2 x 1L cartons of organic, unhomogenised milk).  I think 1kg of organic natural yoghurt was at least $6 last time I looked.  With a Thermomix, all it requires is a little time (and if you do it overnight it feels like it takes no time at all!) and some of the yoghurt from the last batch.  If you're starting a new batch, then you will need a purchased starter.

There are only three things you need to get right when making yoghurt:
  • the starter
  • the temperature
  • the time
The starter can either be a freeze dried culture from somewhere such as Cheeselinks (kind of like using dried yeast when making bread), or some already made up yoghurt.  If you're starting from scratch you need to make sure you purchase the right kind of yoghurt to ensure success.  I use Jalna Pot Set Natural Biodynamic Organic Whole Milk Yoghurt (phew, that's a mouthful).
I have used this brand on several occasions and it has not failed me yet.  Many yoghurts are rendered "inert" by the processing they undergo.  Yes, they contain the cultures, but they are treated in such a way that you cannot use them as a starter.

Now that you've got your starter organised, here are my steps to making beautiful, natural yoghurt with the Thermomix.

Place 2L of milk in the TM bowl.  Set the temperature to 90ºC, 15 minutes, speed 3.  Then allow the milk to cool to 37-45ºC (no hotter or the heat will kill your culture).  The Thermomix does register the temperature but remember that even if it says 37º, it could be anywhere up to 49ºC because the next reading is at 50ºC.  I don't have a kitchen/food thermometer, so I get the thermometer I use to see if my kids have a fever, slip it inside a ziploc bag and dip the end into the milk.  Works a treat and is more accurate than the Thermomix.

Once the temperature is right, add 1/4 cup of starter yoghurt (or the appropriate amount of dried culture), mix at 37ºC for 2 minutes on speed 3 (to get the starter up to temperature and mixed through the milk).  Pour the milk into the Thermoserver, or some other insulated container (even a Thermos which has had hot water sitting in it to pre-warm it), and set it aside for at least 5 hours,  preferably 12 hours.

I normally heat my milk after lunch time, pour it into another jug so I can keep using the Thermomix for other tasks, and add the culture just before dinner time (I normally check it every half hour after the first 3 hours or so just to make sure).  It takes several hours to get cool enough when making 2L (unless you put it in the fridge or employ other methods to cool it quicker).  Then I pour it into the Thermoserver and leave it alone until morning.  The longer you leave it, the thicker it will become (until a certain thickness is achieved anyway).  I have found that 5 hours doesn't make it thick enough for my liking.
After 12 hours is up, lift the lid and behold the wonder!

If you're wondering what the creamy coloured stuff is on the top in the picture above, it's cream.  I buy organic, unhomogenised milk which means the cream still rises to the top of the milk like it did in the "old days".  If you buy homogenised milk, you won't get that layer.
Today, I turned 1L of my yoghurt into Raspberry Frozen Yoghurt.  I scraped the cream layer off the top to use in the frozen yoghurt and added a batch of cooled Raspberry Coulis (recipe in the EDC, but it's basically 200g raspberries, 100g sugar, juice of half a lemon cooked for 4 minutes, 90ºC, speed 4).  I then churned it in my icecream machine.
Yummy, delicious, and healthy!

Last week, I strained 1L overnight using a muslin cloth to make Yoghurt cheese.  I used that to make Roasted Capsicum Dip which I served with crackers and vegetables for snacks.
 

Thursday, March 24, 2011

Amanda's Chocolate Fudge Brownies

Late last night I needed something quick and easy to bake for my son to take to daycare today.  And obviously something that didn't require me to run to the shops in my PJ's.  I've had this recipe on my list of things to make in my Thermomix for a while now, so I decided to give it a spin.

I'm going to shock you now.  I've never made brownies before.  I know, weird right?  I LOVE to bake.  And I've never baked brownies.  Fortunately, this travesty of justice has now been rectified and I am forever corrupted.   I was kind of shocked by how much sugar there is in this little beauty, but I guess it's not something I plan to make every week (although you might need to sit down for a sec...I'm going to make them again this evening).

You can see the original of this recipe here or here.  Thanks to Amanda of Lambs Ears & Honey for this one!

Ingredients

  • 1 cup plain flour
  • 1 teaspoon salt
  • 1 cup brown sugar
  • 1 cup castor sugar
  • ½ cup cocoa
  • 2 teaspoons vanilla
  • 1 cup oil
  • 4 eggs
  • ¼ cup cold water

Directions

1. Put everything into Thermomix and whizz on 7 for about 40 seconds or until all mixed together.
2. Pour into greased 13"x9"x2" pan and bake at 160C for 30 minutes - no longer if you like them quite dense.
3. Cool in pan and then cut into squares.

Tuesday, March 22, 2011

Pina Colada Icecream

I had some coconut 'meal' leftover from making coconut milk, and a pineapple.  What to make?  Pina Colada icecream of course!  Found this recipe, and converted it to use the Thermomix and my icecream machine.

Sorbet is something that the Thermomix does extremely well.  It's also something that I haven't made a lot of.  Now that I've made pineapple sorbet this afternoon, I cannot understand the lack of sorbet making activities in this house.  The texture is simply divine.  Smooth, creamy, melt in your mouth.  And when combined with the creamy, coconut icecream, the taste transports me away to a remote tropical island where the water gently laps at my toes as I lie on the beach in the shade of a palm tree...

Ingredients

  • Coconut Icecream
    • 1 cup shredded coconut
    • 250 grams milk
    • 300 mls cream
    • ½ cup sugar
    • pinch salt
    • 1 vanilla bean, split lengthwise
    • 5 large egg yolks
    • ½ teaspoon vanilla extract
    • 300 mls cream, additional
  • Pineapple Sorbet
    • 150 grams sugar
    • 300 grams pineapple, frozen in chunks
    • 350 grams ice
    • 1 egg white

Directions

1. Place coconut in TM bowl and cook for 7 minutes at 100ºC, speed 1. Add milk, cream, sugar, salt and scraped vanilla bean. Warm through at 80ºC for 5 minutes on speed 1. Pour into thermoserver and allow to rest for 1 hour.
2. Strain coconut mixture back into TM bowl using a fine sieve and start mixing at speed 4. Add the egg yolks one at a time. Set temp to 80ºC for 5 minutes, speed 4. Add the cream and vanilla extract and mix for an additional 30 seconds on speed 3. Cool mixture in refrigerator. Once cool, churn in icecream maker.
3. For sorbet, place sugar in TM bowl and pulverise on speed 10 for 8 seconds. Add pineapple, ice and egg white. Bring speed slowly up to speed 10 and use spatula to incorporate all pineapple and ice, will take at least 1 minute.
4. Once icecream and sorbet are both ready, place into large bowl and fold/swirl together. Spoon into an appropriate storage container and place in the freezer.  Alternatively, layer each flavour into the container, or mix it through completely.  Up to you!

Saturday, March 19, 2011

Saturday Round Up

This weeks round up...

Sunday
  • Breakfast smoothie
Monday
  • Breakfast smoothie, applesauce, mini carrot cakes, yoghurt cheese frosting, Veggie Macaroni Cheese
Tuesday
Wednesday
Thursday
Friday
  • Breakfast smoothie, Honey Soy Chicken Winglets
Saturday
 
What will dear Thermie get up to next week?

Wednesday, March 16, 2011

Apricot & Muesli Balls

I have had this recipe on my "to convert" list for such a long time.  It's really such an easy recipe I'm not sure why it took me so long, however, I got to it today.  It's a great sweetener-free recipe - no sugar, no honey, no sweetened condensed milk.  It uses partially reconstituted dried apricots for sweetness and for binding.  The original recipe is from Good Taste magazine.
 I think it could be "mixed up" in a variety of ways though by substituting various ingredients for the store bought natural muesli.  I used the muesli today because I wanted to get rid of it out of my pantry, but using rolled oats as the majority, you could add any of the following alternatives (plus many others I'm sure):
  • almonds
  • pumpkin seeds
  • sunflower seeds
  • cashews
  • walnuts
  • pecans
  • banana chips
  • shredded coconut
  • currants
  • sultanas
  • craisins
  • dried apple (mmm, imagine an apricot & apple crumble version of this)
The possibilities are endless, especially when you also think about modifying the spices.  How about all cinnamon in the apricot and apple crumble version, or mixed spice with currants and sultanas.
Place apricots in TM bowl and chop briefly.
Add water and spices and cook until softened.  Set aside to cool.
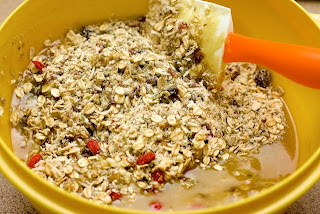
Put the muesli (or combination of muesli-like ingredients) in the TM bowl.
Process until finely chopped.
Add apricot mixture and stir until well combined.  Knead briefly.
Toast the sesame seeds in a dry pan until golden brown.
Form tablespoons of mixture into balls and roll in sesame seeds or shredded coconut.
Eat and relax knowing there's nothing bad in there!

Ingredients

  • 140 grams dried apricots
  • 125 grams cold water
  • ½ teaspoon ground cinnamon
  • ¼ teaspoon ground nutmeg
  • ¼ teaspoon ground cardamom
  • 30 grams sesame seeds, (or shredded coconut if preferred)
  • 215 grams natural muesli (or other chosen dry ingredients)

Directions

1. Place apricots in TM bowl and chop for 3 seconds on speed 5 (this is just to break them up slightly so that whole ones don't get stuck on the blades causing the TMX to work harder than it needs to). Add the water and spices and cook for 14 minutes at 80ºC, reverse soft speed. Set aside for 20 minutes to cool.
2. Meanwhile, place sesame seeds in a saucepan and toss over medium heat for 2-3 minutes or until golden. Set aside.
3. Place the muesli (or other chosen dry ingredients) in the TM bowl and chop on speed 5 for 5 seconds. Add the cooled apricot mixture and stir on speed 4 for 5-8 seconds until well combined. Set the speed dial to lid closed and knead for 30 seconds.
4. Use your hands to roll tablespoons of mixture into a ball. Repeat with the remaining mixture. Toss balls in sesame seeds or coconut to lightly coat.
Notes
I prefer them coated in coconut rather than sesame seeds.
If using shredded coconut for the coating, grind it briefly to help it stick to the balls better.
These are good for kids snack time/lunch boxes etc.  They probably wouldn't cut it for a fancy high tea!  In that case I'd definitely go for a condensed milk version ;-)

Saturday, March 12, 2011

Saturday Round Up

I'm instigating a new regular feature here where I intend to keep track of what I used dear Thermie for over the past week.  This is inspired by Zan's blog (Thermomix Meals) although I won't be as amazingly diligent as she is.  This is a great, simple blog where she lets us all know what she's used her Thermomix for that day.  I won't be that dedicated, but I would like to show each week approximately what I've used my beloved kitchen machine for.

Sunday
  • out for most of the day
Monday
  • Breakfast smoothie, EDC Shortcrust Pastry, quiche filling, Citrus Salad Dressing
Tuesday
  • Breakfast smoothie, condensed milk, yoghurt, icecream mixture  x 2, vegetable puree baby food, apple, peach & nectarine puree baby food, spaghetti bolognaise x 2 (one for the freezer), zucchini soup
Wednesday
  • Muesli Bars, Tenina's Brownie Milk (chocolate topping/milk drink syrup), Isi's Very Normal Bread (rolls) 
Thursday
Friday
  • Herbed Yoghurt Cheese Dip, Pork Meatballs in Tomato Sauce (sauce in bowl, meatballs in Varoma), mashed potatoes, apple & pear puree baby food.
Saturday
  • Broccoli, sweetcorn & cabbage puree baby food.
I wonder what next week's round up will include?

        Friday, March 11, 2011

        Herbed Yoghurt Cheese Dip & Buckwheat Crackers

        I make about 2L of yoghurt every two weeks.  Half I strain overnight to make yoghurt cheese and the other half I use as normal yoghurt (in smoothies, flavoured for desserts, left plain to have with curries etc).  I generally use the yoghurt cheese in place of cream cheese in dips with crackers and vege sticks and I've also used it to make shortcrust pastry.  Today I made a new dip, which may very well be my new favourite as it is so quick, simple and really delicious.

        The crackers are a variation of the Basic Crackers recipe available on Forum Thermomix.  Today I used raw buckwheat and no decorations (I normally roll some sesame seeds, poppy seeds or chia seeds onto the the top of the crackers).  The crackers do need to be quite dry when you take them out of the oven.  If they are still a little soft, they will become quite chewy and unpleasant when cool.

        Ingredients

        • 100 grams raw buckwheat
        • 200 grams bakers flour
        • ½ teaspoon salt
        • 1 teaspoon dried yeast
        • 150 grams lukewarm water

        Directions


        1. Mill buckwheat for 30 seconds at speed 9.
        2. Add all remaining ingredients and mix for 15 seconds at speed 6.
        3. Set speed dial to lid closed and knead dough for 1 1/2 minutes using interval speed.
        4. Take about 1/4 of the dough and roll it out between two sheets of baking paper as thinly as possible.
        5. Sprinkle some of the decorating items and roll into dough using a rolling pin.  Consider docking the dough with a fork or skewer to prevent it rising too much.
        6. Cut cracker shapes as desired and transfer the crackers on the baking paper to an oven tray.
        7. Repeat with the rest of the dough.
        8. Bake in a preheated oven at 190ºC for 10-15mins, or until fully dried.

        Ingredients

        • 200 grams yoghurt cheese
        • 2 cloves garlic, peeled
        • ¾ cup basil, finely chopped
        • 2 teaspoons olive oil
        • ½ teaspoon salt

        Directions

        Place 500g water in TM bowl and heat on Varoma temp for 7 minutes or until water is boiling. Add garlic cloves through hole in the lid and continue cooking at Varoma temp for a further 3 1/2 minutes. Remove garlic and mash with the flat of a knife and add to yoghurt cheese. Add basil, oil and salt. Mix to combine. Refrigerate until ready to serve with crackers and crudites.

        Wednesday, March 9, 2011

        Muesli Bars

        A very simple recipe, found on Forum Thermomix which has been converted from a Better Homes & Gardens recipe.  I had to modify it slightly based on what I had in the pantry, so I've indicated in the recipe below what I did.
        I pressed the mixture into two pans and made it less than one cm thick to replicate commercial bars.  I also chopped up the nuts quite finely to suit my 2 1/2 year old.  As the kids get older I will leave them a little chunkier.
        I do have to add a note here about the overpowering sweetness of this recipe.  It had some sugar reduced when the recipe was posted on the forum and I used even less than that, but still, this is one very sweet recipe.  Next time, I will be reducing the sugar again.  Despite that, this is a really delicious slice.

        Ingredients

        • 40 grams dried apricots (I didn't have any so used sultanas)
        • 40 grams dates
        • 25 grams sunflower seeds
        • 35 grams pumpkin seeds
        • 25 grams pecans (I replaced with raw peanuts)
        • 25 grams almonds
        • 65 grams desiccated coconut
        • 35 grams wheatgerm (I ground some rolled rye into a course flour)
        • 110 grams rolled oats
        • 25 grams oat bran (I ground some rolled oats into a course flour)
        • 15 grams sesame seeds
        • 40 grams craisins or sultanas (I used Goji berries)
        • 200 grams unsalted butter
        • 100 grams honey, (originally 1/2 cup)
        • 120 grams rapadura sugar, (originally 3/4 cup, next time I may only use 80g or so)

        Directions

        1. Place apricots, dates, pecans, almonds, sunflower seeds and pumpkin seeds in locked, speed 10 approx 5 seconds in bowl.
        2. Add coconut, wheatgerm, rolled oats, oat bran, sesame seeds, craisins or sultanas in locked, speed 1 counterclock approx 5 seconds or until mixed. Set aside.
        3. Put butter, honey and sugar in locked. Cook at 80 deg, spd 1 about 6 minutes until mixture is caramelly. Stir caramel into muesli mixture.
        4. Press combined mixture into lined baking tray. Lay a sheet of baking paper on top and press firmly with a flat tray to compress slice. Allow to cool completely. Store in an airtight container and eat within 7 days.

        Monday, March 7, 2011

        Roasted Pumpkin Quiche

        This quiche is absolutely delicious.  Served with a salad dressed with Cyndi O'Meara's Citrus Dressing, it made a lovely meal and got the thumbs up all round.  I used the EDC shortcrust pastry recipe which I'd not used before (I normally make Maggie Beer's sour cream pastry) and I was really happy with it.  It was pretty stiff after it came out of the fridge but a few bashes with the rolling pin and I was able to roll it out successfully.

        Ingredients

        • 1 quantity Shortcrust Pastry, (EDC, cream cheese or sour cream)
        • Filling
          • 300 grams pumpkin
          • 1 red onion, sliced into thin wedges
          • 2 cloves garlic, unpeeled
          • 100 grams baby spinach
          • 100 grams tasty cheddar cheese
          • 40 grams parmesan cheese
          • olive oil, to drizzle
          • 4 eggs
          • 200 grams milk
          • salt and pepper, to taste

        Directions

        1. Make the shortcrust pastry according to directions, roll it out to line pie dish and place in the fridge to rest.
        2. Cut the pumpkin into 2 cm cubes and place on a baking tray. Cut the onion into thin wedges and place on the same oven tray. Add the unpeeled garlic and spray the lot with olive oil spray. Toss the vegetables to coat. Place in a 200ºC oven and roast until tender (approximately 30 minutes). Remove from oven and allow to cool slightly. Turn the oven down to 180ºC.
        3. Steam the spinach until tender, drain and chop finely. Set aside.
        4. Meanwhile, remove the pastry from the fridge, line with baking paper and fill with rice or baking weights. Bake in the oven for 10-12 minutes. Remove from oven.
        5. Cut the tasty cheese into cubes and place in the TM bowl and grate for 10 seconds on speed 8. Remove and set aside. Cut the parmesan cheese into cubes and grate for 20 seconds on speed 10. Remove and set aside.
        6. Place the butterfly in the TM bowl and add the eggs, milk, salt and pepper. Once the garlic is cool enough to handle, squeeze each clove into the egg mixture, add the chopped spinach and half of the parmesan and mix for 30 seconds on speed 4.
        7. Scatter the tasty cheese over the base of the pastry. Place the pumpkin and onion evenly on top of the cheese. Pour the egg mixture over the vegetables and sprinkle the remaining parmesan cheese on the top. Add a sprinkle of paprika if desired. Cook in the oven at 180ºC for 40 minutes or until the centre is set.


        Happy Autumn Days :)

        Saturday, March 5, 2011

        Yoghurt Scones

        Now that I make my own yoghurt (using the Thermomix and Thermoserver), I have been looking for different ways to use it.  This morning, I wanted to make scones for morning tea.  I didn't have cream, and although I could have gotten "busy with the fizzy" and made myself some lemonade, I decided to try a recipe using baking powder.  Traditionally scones need a very light hand when mixing so that they stay light and fluffy, and if there's anything the Thermomix is not, is lighthanded.  There are a number of ways I've seen different Thermomixers attempt to mix things lightly; from kneading on reverse for a few seconds; using speed 1; to using Turbo a couple times.  I'm not sure which one is best, to be honest.  Different strokes for different folks I guess.

        If you have a Thermomix, how do you mix things lightly?

        Anyway, this recipe seemed to be a little more forgiving in the mixing department, even requiring a little kneading before pressing out, so I thought it might be a good one to try.  I was pretty happy with the results (the taste and texture was great) although not all of the scones rose as well as I'd hoped.  I still don't think I've got the light mixing thing down pat yet either, so if I come up with a better method, I'll be sure to update you.  In the meantime, here's the recipe for the yummy scones.

        Yoghurt Scones

        Ingredients

        • 225 grams plain flour
        • 2 teaspoons baking powder
        • ¼ teaspoon salt
        • 25 grams granulated sugar
        • 50 grams butter, cut into small pieces
        • 75 grams sultanas, (optional)
        • 125-150 ml natural yoghurt

        Directions

        1. Preheat the oven to 220ºC and line a baking sheet with baking paper.
        2. Place the flour, baking powder, salt and sugar in the TM bowl, set the dial to lid closed and press the Turbo button 2-3 times to "sift" and mix the dry ingredients together. Add the butter and mix for approximately 5 seconds on speed 8 until the mixture resembles breadcrumbs.
        3. Add the yoghurt and mix together for 5 seconds on speed 5. Add the sultanas, set the dial to lid closed and knead for 20 seconds to form a soft but not sticky dough. Roll out the dough to 1-2 cm thick and cut it into 10-12 rounds with a pastry-cutter.
        4. Place the scones on the baking sheet and brush with a little additional yoghurt. Scatter with sugar and bake for 12-15 minutes, until they begin to brown on the top.

        Wednesday, March 2, 2011

        Ginger Pork Dumplings with Thai Chilli Dipping Sauce

        I love that the Thermomix is capable of mincing meat.  I scored a cheap, boneless pork leg roast earlier in the week, but the only way we can eat pork in this house is to have it minced and cooked with plenty of other flavours.
        Dumplings I decided.  Hmmm, no wrappers.  Google, google, google me a recipe...easy peasy.
        I based the filling on a recipe found on Forum Thermomix from jerjill, but I included more ginger to give it more of a Thai style flavour and some oyster sauce.
        Then it's just a matter of placing some filling on a wonton wrapper, moistening the edges with some water which has added cornflour and sealing them up any fancy way you choose.  I went with easy rather than fancy.
        Then, layer them in the Varoma dish and tray, put 500g of water in the TM bowl, program Varoma temp for 10 minutes (once the water gets to Varoma temp, I used hot-ish water so in total my cooking time was 12 minutes).
        I saw a Thai Dipping Sauce on the forum that I wanted to try so I quickly mixed that up in a bowl, and ta-da!  Dinner is served.

        Ingredients

        • 1 egg
        • ¾ teaspoon salt
        • 2 cups plain flour
        • ½ cup water

        Directions

        1. Place egg, salt and most of the water in TM bowl and mix for 10 seconds on speed 4. Add the flour and combine for 15 seconds on speed 6. Add more water if needed and knead for 3 minutes. Form the dough into a ball and cover. Let rest for 30 minutes.
        2. Turn the dough onto a lightly floured surface and roll out very thinly, or use a pasta machine to roll out to the thinnest setting. Cut into squares.  Makes 24.

        Ingredients

        • 250 grams pork mince
        • 90 grams cabbage
        • 1 onion
        • 3 cloves garlic
        • 35 grams ginger
        • 2 teaspoons soy sauce
        • 2 teaspoons oyster sauce
        • 3 teaspoons cornflour

        Directions

        1. Place ginger, garlic and onion in TM bowl and chop for 5 seconds on speed 5. Check consistency and scrape down and repeat if required. Add cabbage and with the dial set to lid closed, press Turbo 2-3 times, until chopped evenly.  Add mince, sauces and cornflour and mix for 15 seconds on speed 2 + reverse.
        2. Place a tablespoon of mixture onto the centre of a wonton wrapper. Moisten the edges of the wrapper with mix of cornflour and water (or use a beaten egg yolk). Fold up and seal as desired.
        3. Place dumplings in the Varoma. Place 500 grams of water in the TM bowl and cook at Varoma temp for 16 minutes.
        4. Serve with Thai Chilli Dipping Sauce.

        Ingredients

        • 60 grams fresh lime juice
        • 1 ½ tablespoons brown sugar
        • 2 tablespoons sweet chilli sauce
        • 1 tablespoon fish sauce

        Directions

        Whisk all together and pour into small serving bowls.

        Happy Dumpling Days :-)

        Tuesday, March 1, 2011

        Making Sweetened Condensed Milk

        My husband loves icecream.

        A meal is not complete unless there is an icecream course.

        Therefore, I make a lot of icecream...and not a variety of flavours and colours...just one...vanilla.

        I have been experimenting with a few different versions, including one with a custard base.  You know the one, real icecream.  But apparently that's not what he's after.  He quite prefers icecream made from sweetened condensed milk, cream and vanilla extract...full stop.  No skin off my nose really because it couldn't be easier.  A tin of condensed milk, a 600ml carton of cream and a splash of vanilla extract, whizzed up in the Thermomix with the butterfly in place for 40 seconds, straight into the icecream machine and 60 minutes later, delicious vanilla icecream.

        I was pretty happy with where we were with this until recently.  I have read that a few people boycott Nestle products on the grounds of their appalling treatment of women and babies in many third world countries, and by their reckless use of advertising elsewhere.  I hadn't gone so far as to boycott them because, to be honest, I don't buy many of their products anyway...except condensed milk.  Secondly, I am looking to reduce the amount of sugar we are eating.  I have noticed that unless I make something myself, it's easy not to realise, or to have a full understanding, of the amount of sugar in it.  Condensed milk is a classic example.  We all know that it's sweet, right, but dear oh dear, I really had no idea!!
        Poor Man's Dulce de Leche: immediately after cooking (very pourable)
        There are two tricks with this recipe.  One is how long to cook it for, and the other is the speed.  Me, I cooked it too long today and have ended up with "Poor Man's Dulce de Leche".  Not a bad outcome in my opinion ;-), but not what I was aiming for.  I cooked it for 20 minutes initially and then kept cooking it in 10 minute increments until I had cooked it for a total of 50 minutes.  I think when I checked it at 40 minutes, I didn't give due consideration to the fact that this mixture thickens on cooling.  As it turns out, 40 minutes was probably enough, although I'll need to do it again to confirm.  Good thing there will be another time!
        Poor Man's Dulce de Leche: 10 minutes after cooking (still really hot)
        The speed is also important as it needs to be cooked without the MC in place to allow maximum evaporation, but if the speed is too low, the mixture will boil over and you'll have a sticky, sugary mess all over your precious Thermomix and bench.  You must set the speed dial to either 4.5 or 5.  Speed 4 is too slow.

        Taste-wise, what I have now in my fridge has a slight taste of the raw sugar that I used, so I certainly wouldn't be using this mixture for say, a banoffee pie, but I have tasted the icecream I made with it, and I think it's pretty good (I only used 200g of this mix instead of 400g that I normally use with "proper" condensed milk).  I definitely can't taste the raw sugar.
        Poor Man's Dulce de Leche: after refrigeration (sticky, gooey, caramelly yumminess)
        My ultimate aim with this project is to find other sweeteners that I can use with this method instead of sugar.  My next test will be with ground Rapadura (when I get my hands on some), which I know has a stronger taste than raw sugar.  I only hope that when it goes into the icecream mix the taste of it is reduced.  Some fun experimentation to come...

        Ingredients

        • 1 litre milk
        • 750 grams sugar
        • 1 tablespoon vanilla extract

        Directions

        Place all ingredients in TM bowl and cook at Varoma temp for 40-45 minutes at speed 4.5-5 with MC off.


        Happy days, my friends :)